Greeting cards

Lots of people ask, do greeting cards get sent through the snail mail any more?

Yes, yes they do and I’ve sold more than I usually do, not that I sell hundreds of them but I’ve had enough extras to do to keep me busy.

Personalised 18th and 21st are always popular as they usually involve a photo of the recipient at some stage in their life and a favourite colour and if you wish a personal verse inner printed.

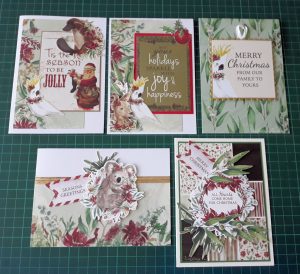
This year it’s Australiana Christmas cards to send over seas as many people can’t travel to meet family in other countries. It’s kept me busy and I’m lucky these can be embellished/decorated as I wish. Sometimes specific orders/briefs  can freak me out as I’m worried that they won’t be liked, but they are.

Do you send letters or cards via snail mail? I do, especially the random one here or there as it’s amazing how a thought on a piece of paper can make some one happy and thought of, bring a smile to a friends face.


Mat or rug grippers/non slip mats/anti skid mats.

They come in rubber and silicone, by the metre or in pre cut packs of various sizes and grids.

I usually buy by the metre which comes in a very wide width and lasts for ages. I have 1 hallway mat that slips and slides and this stuff is needed, but I have a huge family room rug that is heavy enough to stay put with no help.

By the meter is also the easiest and cheapest way to get your much smaller jar grippers as you can literally cut to the size you want, I like them about 15 X 15cm (or 20 x 20cm) but I do have a couple of longish off cuts that work just as well with one end for the jar and one end for the lid. I have many in a few drawers.

I have also found that if they start to get a bit smooth and don’t grip as well that you can wash them in hot soapy water, dry on the drainer and they get most of their stick/grippy back.

Santa sack / Pillow case

As we’ve been lucky enough to welcome a Grand daughter and a Grand son into our family this year, I’m getting back into the baby gifts.

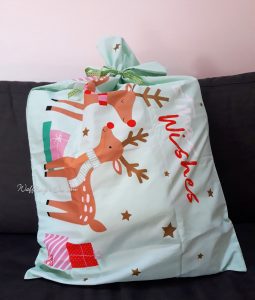
Seeing fabric sales all over the place I went to grab some for santa sacks for the G’kids gifts, Christmas fabric is not as cheap as I remember it being.  Pillow cases are a much cheaper alternative. So here is how I made 2 pillow cases into simple Santa sacks.

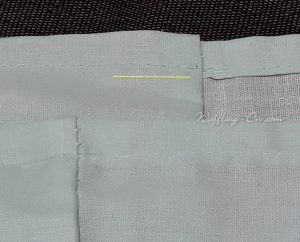
The yellow line in each picture is where I sewed, my cotton was a really good match.

I continued the stitching around the back half (pillow scoop inside) of the case to give the consistent line around the top.

.

I sewed the bottom section of that pillow scoop so that it sat flat inside

Find the ribbon I wanted to use to tie the sack I sewed to the middle of the bottom part of that pillow scoop, the extra thickness making it a bit more sturdy to pull and tie.

I had several thoughts on how the ribbon would keep the sack tied/gathered.

You could sew a few loops to thread the ribbon through then tie.

The pillow case could be unpicked, cut off the inner pillow scoop piece to use as a casing to make it a draw string bag.

If you are not a sewer you can still use an iron on adhesive to keep the scoop part to the pillow case outer down and sew your ribbon on by hand.

If I’ve confused you more by my instructions (what’s in my head does not always translate to my typing skills) let me know via comments and I’ll help you all I can.

Baby clothes savings.

I mentioned to my daughters in law that if they had baby clothes that still fit the bubs if they’d like the sleeves shortened to take into summer clothes I can cut the long sleeves off and hem to short sleeves. They have a lot of legged and no leg onesies.

Well I cut off the first pair of sleeves and promptly remembered that sleeves are generally hemmed before attaching when they are on little clothes. So in this exercise I did a lot of muttering and thanking heaven that only one daughter in law took me up on this offer and it was only 4 sets of sleeves I had to alter.

Anyone had some fun sewing things that should have been easy to do and ended up being a little more complicated?

Stuffed Zucchini – Easy

Stuffed Zucchini - Easy

Prep Time 10 minutes
Cook Time 5 minutes
Total Time 15 minutes
Course Mains
Servings 2

Ingredients
  

  • 2 Med- Large Zucchini
  • 2-3 Rashers Bacon Trimmed
  • 1/2 Cup Cheese Grated
  • 1/2 Small Onion Diced
  • 2 Roma Tomatoes Deseeded
  • Ground pepper
  • Sour cream Optional

Instructions
 

  • Heat griller. (broiler)
  • Pan fry bacon, onion then add tomato and simmer until tender. Set aside in a bowl.
  • Slice zucchini length ways and pan fry cut side down until just tender.
  • Season bacon mix with pepper to taste, add half the grated cheese and mix all together.
  • Carefully scoop out the softened seeds along the centre of the zucchini then place on a tray, cut side up.
  • Carefully spread the cheesy bacon mix along the centre of the 4 zucchini pieces. Top with more cheese
  • Pop under the griller to melt and brown the cheese. Serve with a spoon of sour cream (or Greek yoghurt) on top.

Notes

Off course add more of any of the ingredients to your own taste.
Bake in an oven if you wish, I'd go for 180*C until zucchini is tender and cheese browned.
Line a baking tray with browned but uncooked zucchini, cover with spaghetti sauce/bolognese and top with grated cheese, then bake.
Play with it.

Load more